Your Cart is Empty

Disc Brakes - How To Check For Wear
Commuting in a hilly city like Wellington puts a lot of pressure on your brakes. While electric bikes can flatten any hill, the added weight of a motor, battery and cargo puts more demand on you brake pads. Hence people are often surprised how quickly they can wear out!
The goal here is to replace the brake pads before they get dangerously worn. This is the difference between about $40 for new pads to upwards of $200+ for a whole new brake calliper and rotor. Yikes!
If you live up the top of a hill and or commute daily, you should check your brake pads for wear after about 300km and every 50km after that. We expect pads on a cargo bike to last about 500km, but this is heavily dependent on the use case. Therefore, it’s always better to check these things early.
Signs of a dangerously worn brake pad include reduced braking power, performance, and noisy brakes.
If you're unsure about how to check your pads, zip down to your friendly local bike shop and in most cases, they can assess in less than a minute at no charge.
Keen to check for yourself, then read on:
First, let's go over the basics. The disc braking system is comprised of three main components: rotor, pads, and caliper. The rotor is the large metal disc that's connected to your wheel. The pads are the friction element and are the most consumable part of the system - they sit either side of the rotor. And finally the caliper is the mechanical force of the whole assembly, it works as a hydraulic or cable actuated clamp that squeezes the brake pads against the rotor.

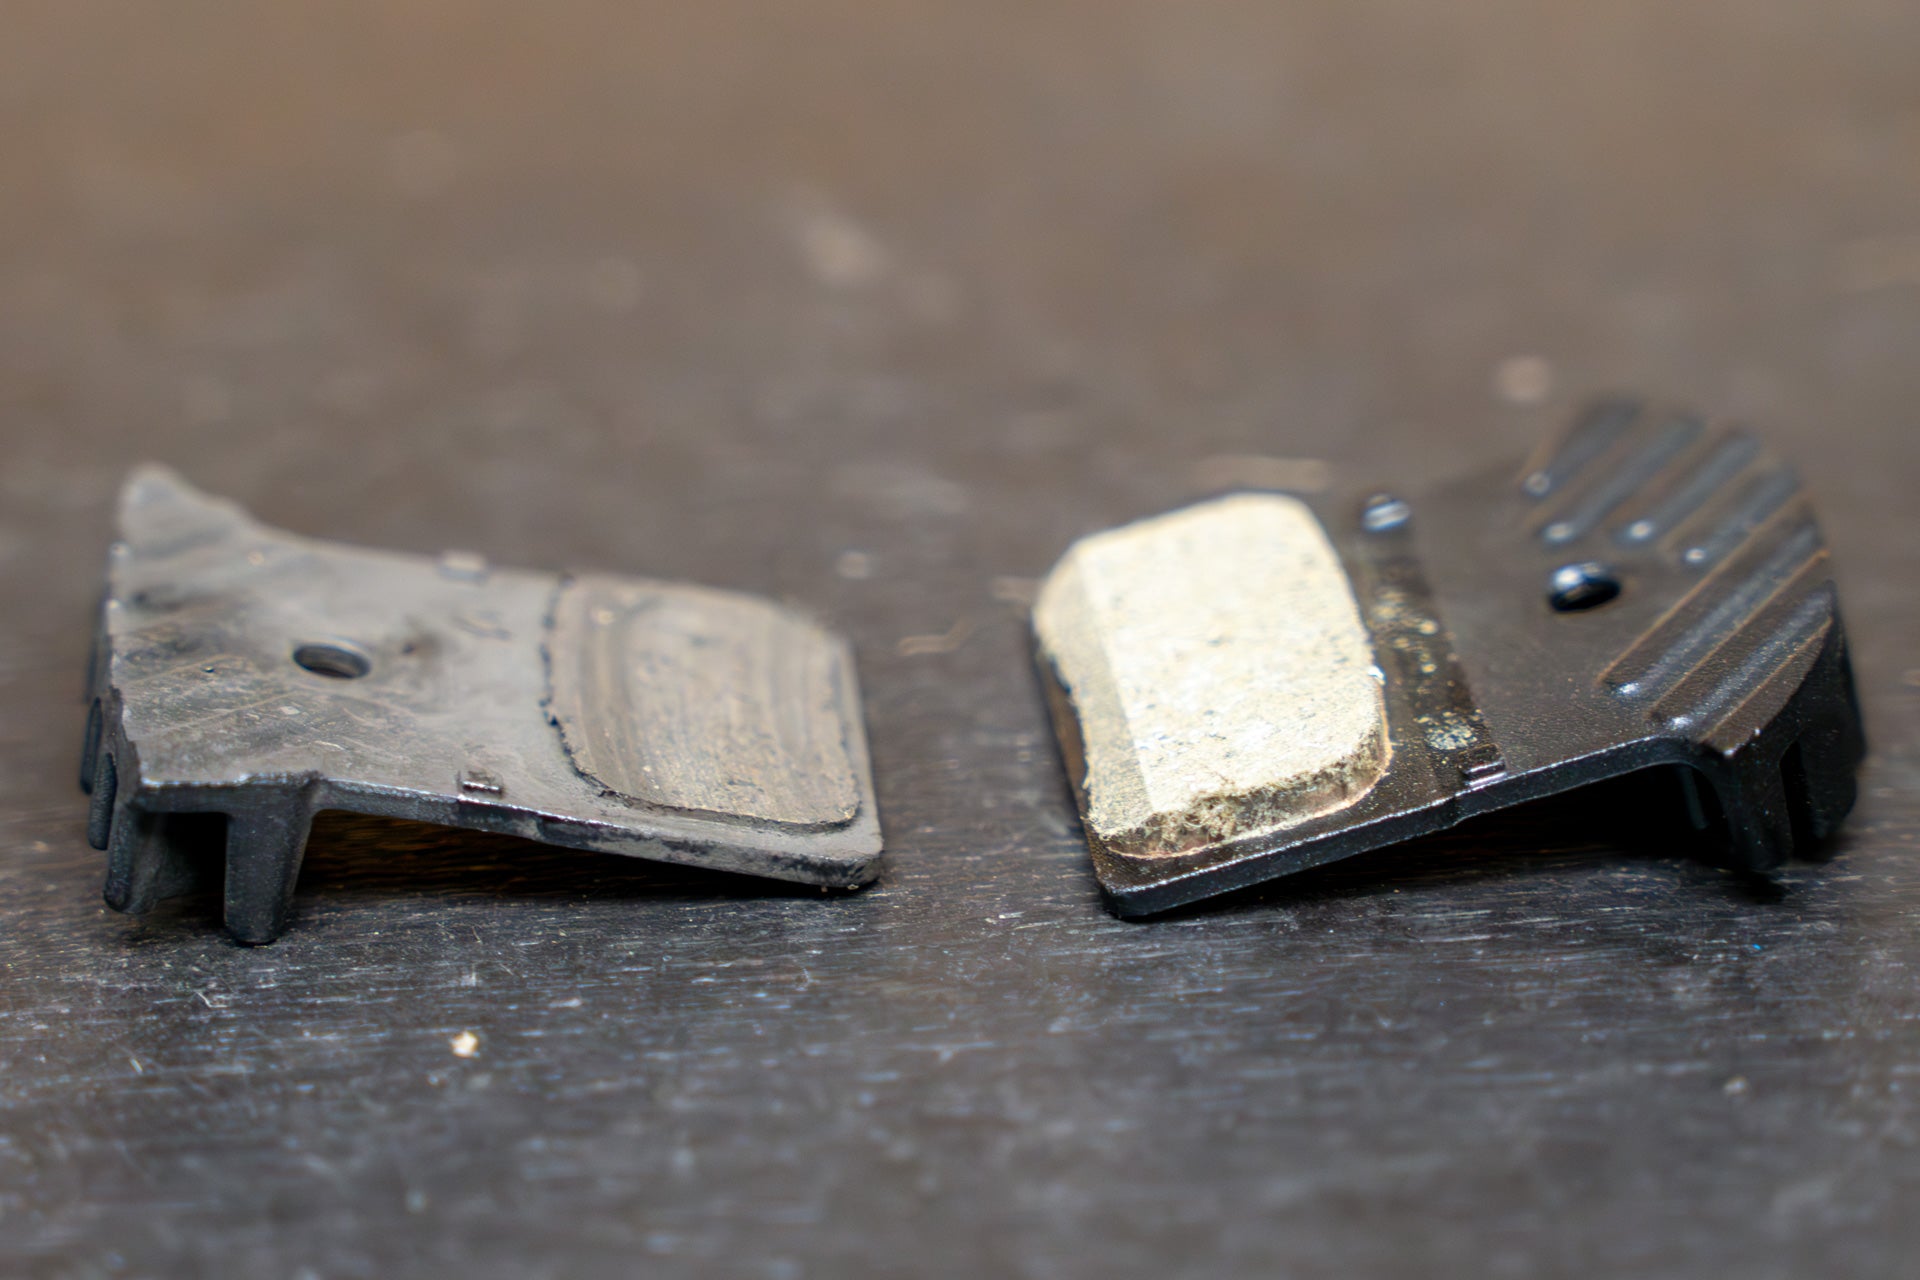
On the left, we see a dangerously worn brake pad. On the right, a shiny new brake pad. A good rule of thumb is to replace the pads before they wear down to the retaining spring. Have a good look at the images below.


The pad on the left has worn down to the retaining spring, meaning it was overdue being replaced. This could be a costly fix because not only would the pads need to be replaced but it's likely the disc rotor was damaged from grinding up against the metal retaining spring.
Now that we've painted a picture showing what to look for, now it's time to check for yourself.
Depending on what is easiest you might have to get low to have a good look at your brake. You can often see the brake pads from the top of the brake calliper or down the line of the rotor.

In the image above you can see there is a lot of brake pad ahead of the metal backing plate - in this case you're all good to go!
If you're finding it tricky to see the pads, we find it helpful to squeeze the brake lever so we can see the pad moving inside the calliper - this extends the pistons giving you a better visual on the pads. Using a light also helps immensely. Goodluck!
If you have any further questions leave a comment below, give us a call, or pop in a see us.